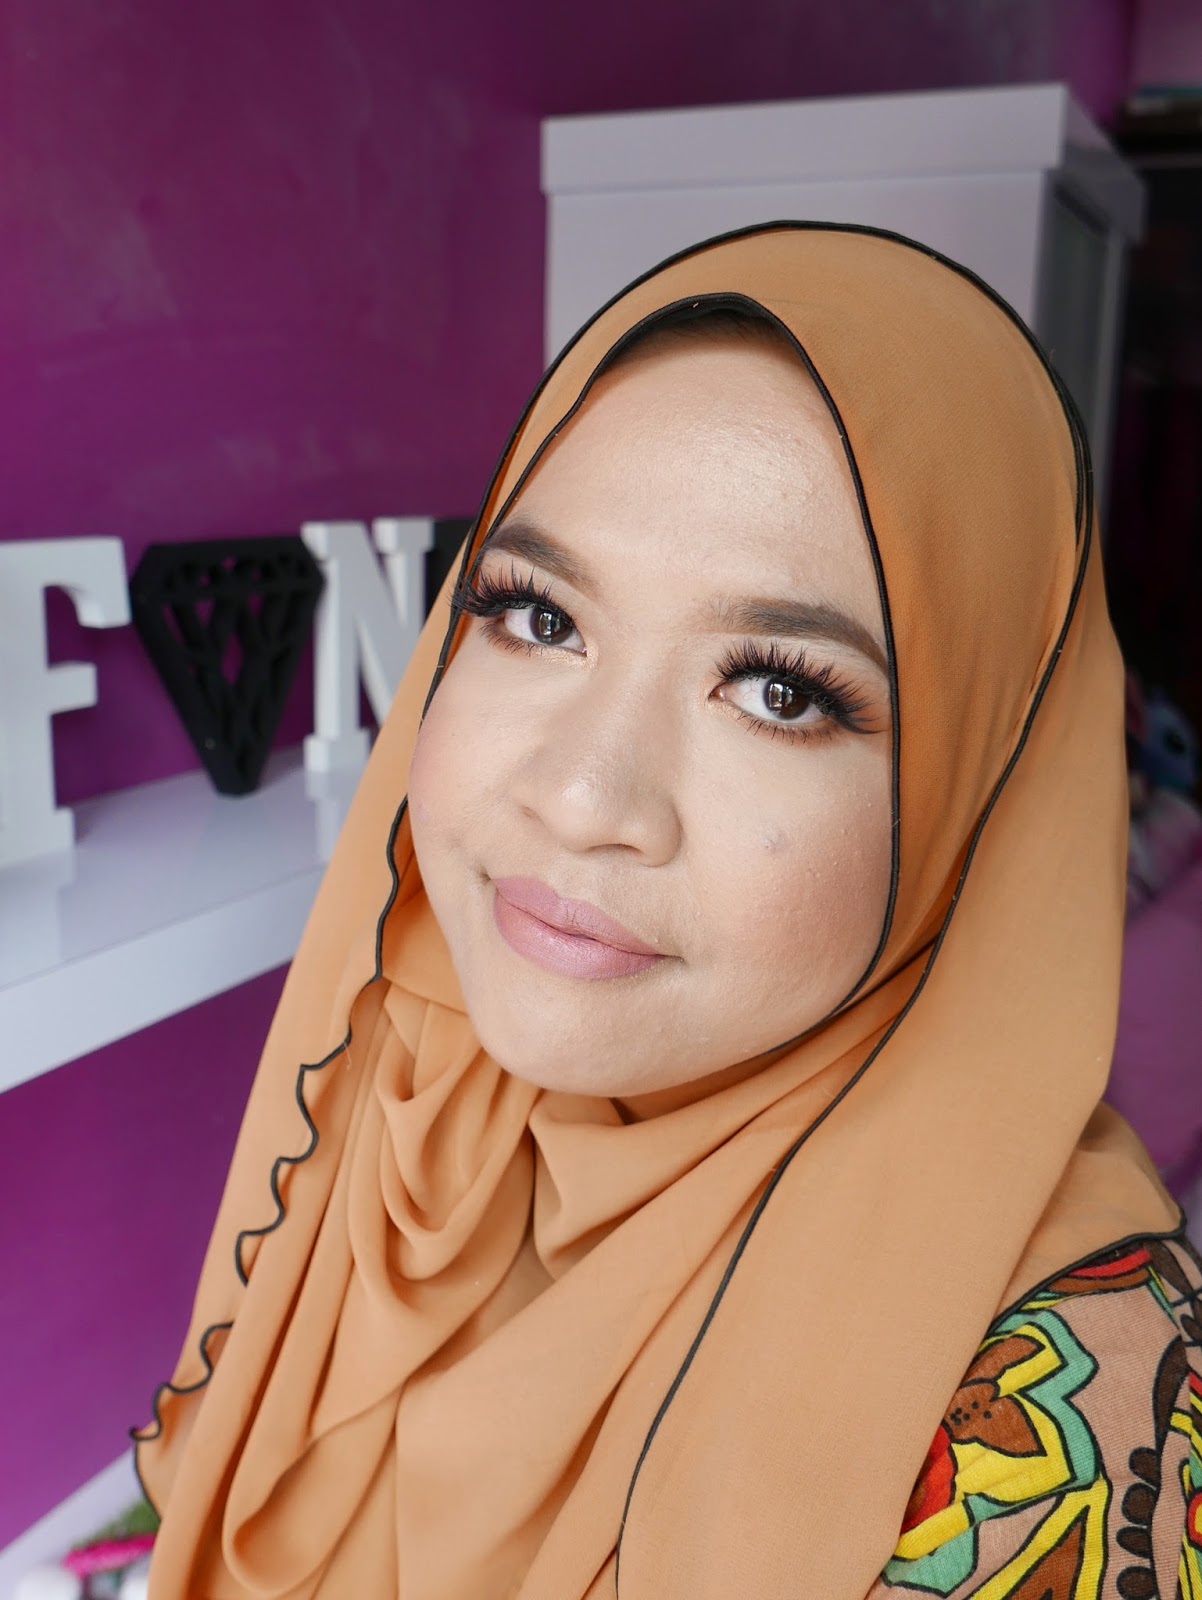
Review : Moonshot Jelly Pot [Bronze Champagne & Mocha Martini]


Hello full-of-dusts-and-spider-webs blog.

*cough*cough*

Sorry for the long hiatus. Oh wait. Nobody cares. K fine, sendiri cakap sendiri sentap. 

Have you heard of Moonshot cosmetics? Cause that plays a huge part in the blog post of the day.

Moonshot is a Korean cosmetic brand by YG Entertainment company featuring a bright, funky and quirky makeup concepts. Yes that YG. Papa YG's YG.

Cue music *snaps finger*

Naega jeil jal naga. Bam ratatata tatata ratatouille. *menari style Ayda Jebat*

Moonshot arrived at Sephora stores in Malaysia few months ago and being a curious cat that I am when it comes to makeup, I just had to check them out. Sure enough, Moonshot section at a glance screams sleek and edgy with a pop of bright and vivid colored makeup here and there. The concept of dwelling into eye catching makeup and bringing out the extraordinary within the ordinary, that is so YG . I mean, pfttt. 2NE1 to anyone? Woooo redundancy.

Well today, I want to review this one Moonshot's makeup product in particular, which has reeled me in the moment I touched it. Looking at the product itself gives me eye orgasm on its own but it was the touch of it that jolted my entire body.

Yeah baby I'm talking about Moonshot Jelly Pot right here.


PRODUCT 
Moonshot Jelly Pot 

SHADES
I picked up 2 shades out of 18 available. Spent hours swatching everything cause ya know Mama wants 'em all.

P06 Bronze Champagne
P07 Mocha Martini

AVAILABLE AT
All Sephora stores in Malaysia.

Edit : Guess what guys? You can now purchase it online through Sephora Malaysia's website!
Not only the Jelly Pot but also all of Moonshot's awesome products. Now that it is a click away, we are so doomed, you and I. Haha.

Moonshot - sephora.my


Or kalau kau agak2 kekwat, kau beli la dekat website Korea.
Moonshot-Cosmetics

PRICE
RM84


TEXTURE
This magical lightweight plastic pot houses a jelly cream shadows that comes with 2 different finishes; matte and pearl. Both shades that I bought have pearl-y sheen finish. The texture of this eyeshadows are so unique to me. They don't feel like a bouncy jelly. Well at least what I thought it would feel like since it's called jelly. They feel more like a concentrated liquid poured into a pot. When you tap on the eyeshadow, it feels like touching a syrup minus the stickiness. There will be a dent on the surface of the eyeshadow but since it is practically a liquid, it will whooshhh back and become perfect like you haven't dip your finger in it. But you know you did. Naughty naughty.

A little goes a long way with this eyeshadow. Like seriously. I barely need to tap into it and what's on my finger can cover the entire eyelid. Pigmentation is so strong with this one. It's easy to blend and goes on smoothly. But I would recommend using your finger to do so. The way that I find work best is to dab it on the lid and blend it with small strokes.

Major point to be taken note of this eyeshadow is that, although it has a thick liquid texture, it sets into powder finish. So if you want to bring your eye makeup game to the next level level by topping off another powder eyeshadow on top of it, it's got you covered baby. It will amplify the eyeshadow without looking blotchy.


♥ Bronze Champagne♥
A sparkling light beige with a hint of frosty pink color. This shade looks like a light bronze color in some light but when you turn it around facing different lighting, it reflects as a subtle pink champagne color. It has beautiful sheen to it and it is a great everyday lid color.


♥ Mocha Martini♥
A golden gold color. I think that's the perfect way of describing color. Like that sparkling gold coins Harry Potter's parents left him in the bank. This shade also has that pearl-y sheen with deep golden color pay off. I love this color as inner tear duct highlight. It draws the attention to the eyes, looking very chic and glamorous.


Some looks that I created using these two Jelly Pot eyeshadows:


Bronze Champagne

Mocha Martini

PROS
- Beautiful color range and sheen finish
- Highly pigmented
- A little goes a long way, I'm not even kidding
- Easy to use
- Packaging is lightweight for travel
- Can put powder eyeshadow on top
- Doesn't budge when it sets

CONS
- The whole pot MAY dried up fast before you could finish it all
- A bit pricey

FINAL VERDICT
Overall, I'm very much satisfied and in love with Moonshot Jelly Pot eyeshadows. The whole Jelly Pot range has beautiful eyeshadow colors ranging from wearable daily use to intense dramatic colors. I already have few shades that I've been itching to get my hands on. But my purse itches more from being all empty and dusty. Haha.

The major brownie point for this jelly pot is that you just need to use a teeny tiny dot of it to cover your entire eyelid. Meaning, 1 pot for your entire life. I kid you not. So although it's a bit on the pricier side, I'd say it is well worth it. My only concern is that it may dried up before you could even finish quarter of it. But hey, there's a solution for that. No, I mean a solution. You know, the ones used to dilute your dried up makeup. Or better yet, since this eyeshadow turn into a powder finish when it's dried up on the eyelid, just use it as a typical eyeshadow when it boils down to that right? 

That theory is yet to be proven. Come back and check for the update 5 years later. Haha.

Till my next review,
Atin

Follow me on Instagram. Or don't. Let your heart leads. Ahiksss~
@nurfatinzakki

Tutorial #27 : Burgundy Cat Eye Makeup Look


Hellooooo beautiful people!

I never used a scotch tape for my makeup but I've been wanting to, so I used it.

#storyofmylife #theend

Immediately, I felt inspired to do a sharp edgy cat eye look so today I'm gonna show you step by step on how I achieve this smokey burgundy cat eye look. It looks intimidating but it's soooo easy to achieve. I think this was the fastest makeup look I have ever done. And since the cat eye look is purposely left looking sharp and kinda cut crease, there weren't so many brushes went down to create this look. No crease blending so no 18 brushes needed. Mih mih mih.

The ingredients:


Oh and also a scotch tape. Or dalam bahasa Bagan Serai nya, selotep.

Step #1:
Tape down the selotep on the outer edge of your eye, depending how slanted you want your cat eye to look. I used the side of my nose and the tail of eyebrow as my guide. After that, use any felt tip eyeliner and start lining the outer tail shape of the cat eye. Don't worry if it looks messy cause we can fix it later. Don't worry, look how I did mine. Like I was struggling doing it in the middle of earthquake. Watlek watpis.


Step #2:
Next, use a gel eyeliner and fill in the outer edge of the cat eye shape. I used Marc Jacob gel eyeliner something something in the color something something which is obviously a black but what fun to just call it a plain black right. It has to be something something. Ooooo..kay so you can just use any black gel liner that you have. 

After that, set the area with a black eyeshadow and blend it slightly to the front.


Step #3:
Here I used the mix of Makeup Geek's Raspberry and Bitten to create a red burgundy color and pat it on the center of the lid, blending it with the black eyeshadow color.


Step #4:
Use any light beige eyeshadow and highlight the 1/3 of the lid and highlight the tear duct as well.

Gently remove the scotch tape and you will get a nice sharp crisp line like meow meowwww.


Step #5:
Line the waterline with black liner, use a black eyeshadow on the lower lashline and smoke it out with the same burgundy color used on the lid. 

Glue on you fav falsies and mascara your lashes, and ang ang ang tot te mo dai yi suki Doreamon~ 
Meowww it's done!


Till my next pictorial,
Atin
 Mata Sepet

Follow me on Instagram. Or don't. Let your heart leads. Cececewahhh tooodiaaaa~

@nurfatinzakki


Review : Too Faced Born This Way Foundation


Hey you you. Hai awak awak.

I've had this foundation since the first week it was launched in Sephora Malaysia. That was about a month ago. And that was how long this blog post was kept in draft. *blows dust*

So here goes, my review on the new Too Faced Born This Way foundation. Let me tell y'all how I came about to buy this foundation.

Well the obvious reason is definitely due to the gulping and wiping drools out of my mouth when I saw everyyyy beauty Youtuber was using this foundation. It looked amazing when applied and the reviews were explosively positive. And then, this foundation arrived at Sephora here. I was excited but still going back and forth whether or not I wanted to purchase it. Few days after that, I thought I better check it out first, you know, just to see the texture and what not. So I went to the nearest Sephora but I couldn't find any of it. I asked the BA there and she said, "Sorry miss, the foundation has already sold out."

I looked at her with what might look like a gentlest look but in my mind I already grabbed her by her collar.

WHAT DO YOU MEAN IT WAS SOLD OUT?

I couldn't remember much what happened after that but I'm pretty sure I was carried out from there in a stroller with someone on top doing CPR.

You know when you hesitate whether or not you want to buy something, but then you find out it has been sold out, you heart breaks into pieces and you run out, get down on your knee, screaming NOOOO while looking up to the cruel sky? You realize that you actually wanted it all along? Yeah I feel ya, I feel ya.

So I called another 2 Sephora and they dropped me with the very same nightmare news. Sold. Out. Where have you ever heard a foundation sells out within few days? Where? Did they just bring in 2 bottles of it or what? I was calling Sephora here and there frantically, like I forgot that I left my kids there and realized it few days after. Haha. No, I'm not that terrible. I love my kids. Oh, wait. What kids? I'm not even married yet. Krik krik krik.

Anyway, luck was on my side as Sephora KLCC still got the foundation but they were running low. I put my Usain Bolt cap and sprinted to KLCC  to get mine. And I got it finally! Such drama for a foundation. Kalah Syurga Nur.


Too Faced Born This Way foundation retails for RM135 and comes with 8 different shades (it was 8 on the shelf at the time but I will check back and update). I got mine on Light Beige. I could have worn Natural Beige, a shade darker. But whatever. Acah2 Qu Puteh jap. I think the price point is not too bad, comparing to other foundation like Nars, Mac, etc. The foundation is housed in a frosty glass bottle with gold detailing and it comes with a pump. TGI a pumped bottle. The foundation claims to be an oil-free foundation that masterfully diffuses the line between makeup and skin, giving you a natural looking, luminous and flawless complexion. It's also infused with:

Coconut Water
to delicately replenish skin's moisture levels

Alpine Rose
to brighten skin's appearance and promote elasticity

Hyaluronic Acid
for a smoother, more youthful appearance

Now, now. Enough with the written thesis. Let's see how it performs on my skin.

I have a very problematic skin; acne prone with red and dark scarring. Yeah, I'm one of those women who would likely to be sued after my husband sees me without makeup.

Tadaaaa~ My bare skin. Aloo tembam tembum guci guciii.


After one layer of the foundation on the right side:


Can you tell, can you tell? Uuu uuu can you tell?


If the right side doesn't look a bit better than the other side, I wouldn't have known which side I put on the foundation. As you can see, the foundation evens up my skin and covers up most of the scarring, except for that dark stubborn one. The coverage is definitely buildable but what amazes me is how natural it looks. I'd be lying if I said it almost looked like I have no foundation on. But it's the most natural looking foundation I've ever put on.

Full face foundation:

A little of this foundation does go a long way. I usually used 2 pumps for my whole face but I still have plenty left with this foundation so I use it to build up the area the needs more coverage.

Completed makeup look:

After 4++ hours:

Usually at this rate, my face would be drenched with oil. Like I just tripped into a pool of cooking oil. But with this foundation, my face looks more like it gleams. Acah2 mekap Korea. I could never pull off the dewy look. But this one, I'm digging it gewrrrll~ Aummm~

I did touch up my face but I did not powder or use a bloating paper. I just tap on my T-zone with a dry sponge to wipe off the excess oil.

6++ hours after that:


I loveee this foundation. It has medium buildable coverage. It is buildable but it doesn't build up to fullest coverage that I want. You can still see that  the dark scar spot on my cheek is still peeking through even after I layer the foundation up. The texture is a bit runny but it is not thin. Honestly I did not like how it felt when I first applied it on the face. I feel like the foundation sets quickly but when I touched it, it actually hasn't set. Weird. I'm weird I guess. It has satin finish and you do need to set it with powder, otherwise it will move. At least on me. I love it after it has blended with my skin. Orang kata bila dah pecah minyak. Hiks. Ingat muka aku sambal ikan bilis ke hape. It ticks all the claim boxes for giving natural looking, luminous and flawless complexion.

The other thing that I notice with this foundation is that it does not look cakey at all. And most importantly, it does not settle into the lines on my face. I'm talking bout that nasty lines on my forehead and around the mouth when I smile. I often get line mark there cause I smile a lot. Like merenyeh kinda smile. Like a smile with serious eye gaze.

The only downside that I found is that this foundation clings to dry patch. I have few dry patches around my acne scars and this foundation holds to every one of it despite claiming to have coconut water that's supposedly will enhance the moisture level of the skin. So, moisturize before you use it. And powder. Yes powder your face. I'm talking to you oily gals out there. Yes you. Of course I'm talking to you. *pointing finger at the mirror*


PROS:
- Has a pump *wink wink*
- Gives the most natural looking finish
- Medium coverage
- Lightweight
- Pigmented; a little goes a long way
- Doesn't look cakey
- Doesn't settle into lines

CONS:
- Clings to dry patch
- Luminous effect (it's a turn off if you are into matte finish)

MY FINAL VERDICT:
I love it. I recommend it. Go buy it now.

I hope this review is helpful to make you have RM135 less in your purse.

Bahahaha.


Till my next review,
Atin


Follow me on Instagram. Or don't. Let your heart leads. Cececewahhh tooodiaaaa~
@nurfatinzakki


Tutorial #26 : Olive Green Makeup Look ft Too Faced Chocolate Bar palette


Hey hey you you.

I'm back with another look that I created using Too Faced Chocolate Bar palette. I'm super late to the party but I finally got my hands on the palette and lemme tell ya, I must be outta my mind for picking it up this late. It's sooo beautiful and pigmented and easy to blend. Have I told you about the smell? Oh the smell. I almost throw it on my plate every time I open it. Who can resist the smell of cocoa?

Well anyways, I hope you enjoy this antique olive green makeup pictorial look. Leggo!

Bahan-bahannya:


Step #1:
After priming the eyelids, use Salted Caramel and swipe it on the crease and blend it upwards and into the inner corner of the eyes. Betapa banyak and daaa...


Step #2:
Dip your blending brush into Semi Sweet and dab it on the outer V of the eyes. Make sure to blend it into the crease as well. Blend blend tonyoh tarik nun diaaaa~


Step #3:
Then, I used Maybelline Color Tattoo in Bold Gold as a base for my eyelids for the next eyeshadow to stick to and making it's color pop even more.


Step #4:
Take Gilded Ganache and place it all over the lids where the Bold Gold is placed. Pat pat pat, dab dab dab.


Step #5:
To darken up the look even more, use Triple Fudge and place it on the outer portion of the eyelids. Blend it into the crease all the way to the front corner of the eye.


Step #6:
Lastly, use Gilded Ganache on the lower lashes and smoke it out with the mix of Salted Caramel and Semi Sweet.


I used House of Lashes in the style Iconic to amp up the look. No liner is needed cause these falsies are everythangggg~


Hope this inspires you to create your look using Too Faced Chocolate Bar palette.

Have loads of fun yauwl!

Oh, and Happy Independence Day Malaysia!

Till my next pictorial,
Atin


Follow me on Instagram. Or don't. Let your heart leads. Cececewahhh tooodiaaaa~
@nurfatinzakki

Review : Zoeva Cocoa Blend Palette


Hey guys! Hi. Hello. 

Thank you for dropping by.

If you are here on this page, that pretty much means that you would like to read my thoughts on the gorgeous Zoeva Cocoa Blend palette. You're in luck, cause I'm throwing in swatches of all the eyeshadows on here as well. I'm just gonna save you from the dreadful of listening reading 1001 reasons why I bought this palette. It was love at first sight, I wanted it, I needed it probably, I bought it. It's done kay? Naa aaa aaa syyhh syhhh not a word ok? *I just face palm-ed you there*

Just one word to describe this palette.

Beautiful.

Pigmented.

Gorgeous.

Stunning.

Rosa.

Linda.

Okay maybe 6 words, but who's counting? Ngehh.

This palette featured 10 eyeshadows with a good mixture of matte, satin & shimmery finish. The color hues are mostly warm toned with an exception of couple cool neutral colors. What caught my eyes first was the beautiful warm cranberry red eyeshadow and its pigmentation does not disappoint me at all. Most of the eyeshadows are so smooth and pigmented, but of course there's always the few that do not perform as well. That's just how life works, yeah?

All eyeshadows are housed in a thick cardboard palette that comes with an insert. 


Isn't she lovely. Isn't she wonderful. Isn't she precioussss.

Now onto the eyeshadows and the swatches.

♥Bitter Start♥

The first top row color that you get is this subtle off white color called Bitter Start. It has semi matte finish and comes off a little bit powdery. It's not really pigmented when you first swatch it but it is definitely buildable. I wouldn't say the start is bitter. I would call it, Chin Up Be Confident. Some motivation there, girl. But anyway, I love using this color to set my eye primer and to highlight the brow bone. It'll look beautiful as all over lid color for a simple effortless makeup look.

♥Sweeter End♥

Next up we have Sweeter End, a light peachy shimmery color. The texture feels light and soft. It's pretty pigmented but the color does not really pop. I don't fancy this color that much anyway. Sweeter End you say? More like, Know Your Place Please. Haha.

♥Warm Notes♥

This color right here is what draws me to this palette in the first place. The warm cranberry red color is spot on beautiful and totally right up my alley. It has shimmery finish with rich buttery high pigmented texture. Sooo gorgeous!

♥Subtle Blend♥

Subtle Blend is a warm golden bronze-y color with shimmery satin finish. This color is sooo buttery smooth and pigmented. This will look beautiful to be used for dark smokey bronze look.

♥Beans are White♥

Beans are white. Oo..kay?
But this color is a deep cool toned brown with a matte finish. This eyeshadow is the most disappointing one as the color is has the least pigmentation. I built up this swatch with so many layers, I almost could see smokes coming out from my finger. Ishhh spoil betul. As you can see, the color is definitely buildable if you want to darken up your look. But maybe after 18 minutes of layering lah.

♥Pure Ganache♥

Pure Ganache is a bright golden coppery color with warm undertone and metallic sheen finish. Another one of my top fav from this palette. I think this color is dupeable for sure but it is still gorgeous nevertheless.

♥Substitute for Love♥

Ahhhh. Should I say more? I reallyyyy love it when a palette includes a blending color, especially a warm orange brown like this one. Purrfectttt. It looks almost similar to my all time fav Creme Brulee eyeshadow by Makeup Geek, only a little bit darker and warmer.

♥Freshly Toasted♥

A reddish deep brown with warm undertone and matte finish. Another color that I really really appreciate being included in a palette. On top of that, it has great buttery pigmentation and rich in color without being powdery like most matte eyeshadow tends to have. Perfecto!

♥Infusion♥

Infusion is a dark brown coffee color with a hint of gold glitter in it. I was pleasantly surprised with the pigmentation as I did not expect it to be as pigmented as it is. I have encountered many similar concept eyeshadows like this; you know the ones with a sprinkle of glitter or shimmer in it, but most of them is very chalky and needs to be built up. This one however surpasses my expectation. But the glitter looks subtle on the lid so don't expect to have full on disco ball glitter on your eyelids.

♥Delicate Acidity♥

The last eyeshadow in this palette is called Delicate Acidity, which is a very beautiful cool toned mauve-y taupe with satin sheen finish. Beautiful isn't? This one has great pigmentation too and packs on really smooth on the lids.

Top Row

Bottom Row


PROS:
- Consist of variety finish and formulation, from matte to metallic sheen
- Great pigmentation
- Value for money
- Slim and lightweight packaging
- It has transition eyeshadow color (which is a major brownies point for me)
- Color varsity from light to deep, warm to cool tones

CONS:
- Couple of miss eyeshadows in term of texture and pigmentation

MY FINAL VERDICT:
I loveeee this palette so much. Swatches above speak from themselves. It is a great palette to be added to your collection. Although the colors are not unique and are likely to be similar to the ones you probably own, I really think that everyone should have this palette as it consolidates all the eyeshadows that you need; either for simple laid back daily look or intense bronze/golden look. One palette for all katanya kau oi. I highly recommend it. You cannot beat the price for such great quality eyeshadows in the palette.

Okay, I'm out of vocabulary now. Aigibab. Signing out. 

Get the palette HERE for only RM89. Or you can pre-order from CakeFaceConfession here on IG where I got mine.


Till my next review,
Atin

Follow me on IG :